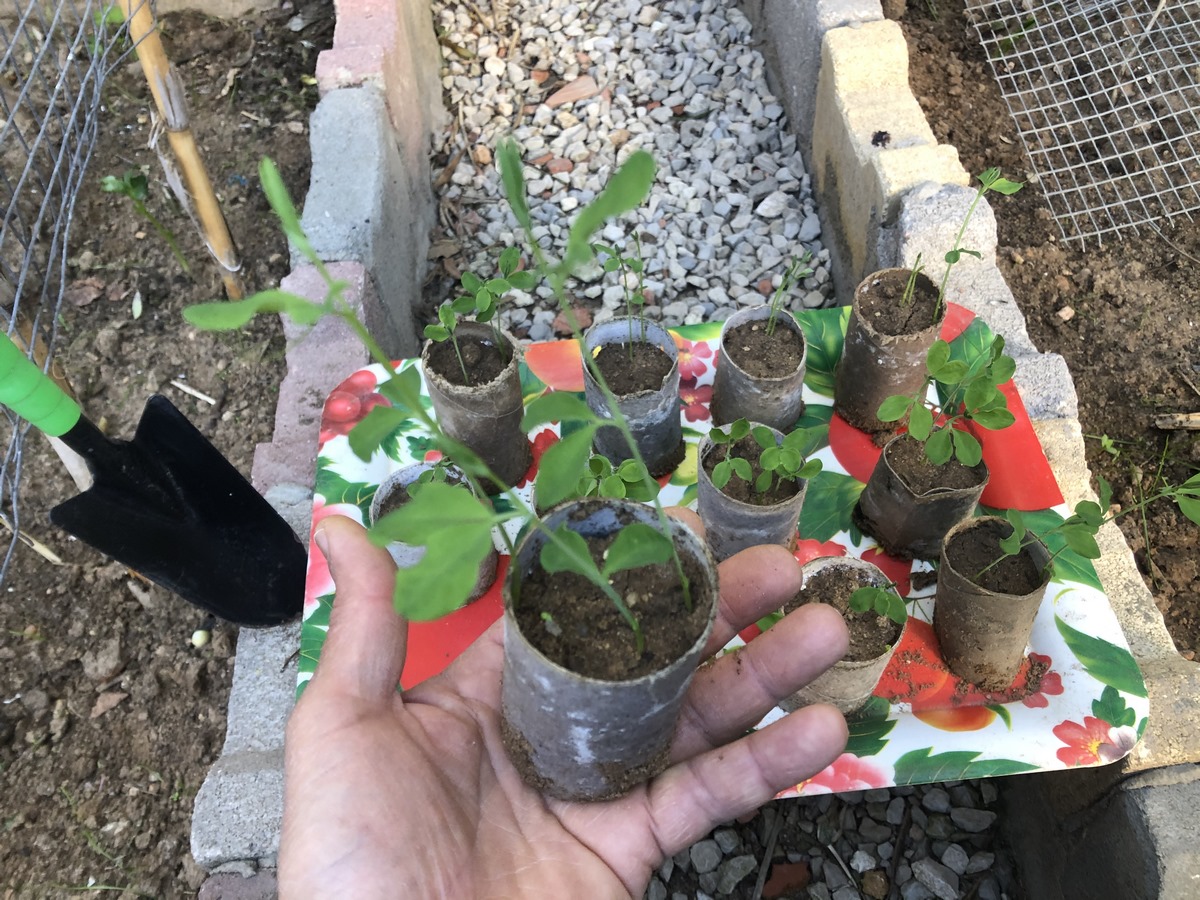
Sweet peas produce vibrant, fragrant flowers that are excellent for cutting. To ensure that your sweet pea seeds are started off well and that you will not have to worry about rotting seeds, start them indoors. This will ensure that the seeds will not rot before they sprout under the soil, producing a successful plant with vibrant, fragrant flowers that are excellent for cutting. Since sweet peas are basically teenagers and dislike disturbance once they start growing, starting them in toilet paper rolls is a great way to start your sweet pea seeds indoors before moving them outdoors. Moving the seedlings from small pots to the garden can cause transplantation shock and damage to the roots. Toilet rolls not only make excellent starter pots for bean seedlings, but they also make terrific tiny portable planters. Once the seedlings are placed in the soil, the paper roll will eventually dissolve away. Keep reading as you will learn how to transplant Sweet Peas seedlings into the garden started in toilet rolls, discover all my tips for ensuring their healthy growth and development.
Getting Sweet Pea Seedlings Ready for Transplantation
Prior to beginning the transplanting process, there are a few essential tasks that must be completed. These steps are crucial in preparing your sweet peas for their relocation from the seed tray to your garden!
Pinching Seedlings
Prior to acclimating your sweet peas to the outside environment, it is necessary to trim them a bit! Pruning sweet peas seedlings stimulates the growth of additional shoots, resulting in a higher yield of flowers over time.
Although it may seem drastic to remove all of the growth, I assure you it is beneficial. When your seedlings reach a height of 4–6 inches, trim the top just above a leaf node. Ensure that there are 2 or 3 sets of leaves remaining below the cut. After a few days, new growth will begin to appear on the lower part of the plant. Each shoot will eventually develop into a lengthy vine with a profusion of flowers!
Hardening Off Seedlings
Once the stems have been pinched, the next step is to get the seedlings ready for their transition to the outdoors. This is known as 'hardening off'. Essentially, we will gradually expose the seedlings to the outdoor environment over the course of a week. Sweet peas are able to tolerate a light frost, so this can be done before the last expected frost date.
The progressive approach aids in strengthening them and preparing them for the challenges they will encounter in the garden. Begin with a gradual process of leaving them in a shaded spot for a few hours before bringing them back indoors. Gradually increase the time and exposure to sunlight every few days until the stems become firm.
Want to read: How to Harden Off Seedlings for Transplanting
Soil Preparation
As our young plants adjust to the outside environment, we can shift our focus to the soil in our garden. Sweet peas thrive in rich and well-draining soil, as mentioned in this source. If your garden bed is not ideal, there is no need to fret - organic compost can come to the rescue!
Enhance your soil with essential nutrients for the thriving of your sweet peas by incorporating organic compost. Additionally, the use of compost can also enhance soil drainage, providing an extra advantage. Work in a lot of garden compost or well-rotted manure; I always use well-rotted chicken manure; this organic fertilizer will enrich the soil; chicken manure is great for fertilizing vegetable gardens; it is a non-synthetic organic fertilizer with many advantages; it is a complete natural fertilizer, containing potassium, phosphorus, and nitrogen, the macronutrients; it also contains calcium, an essential micronutrient for healthy plant growth.
Watch Adding Chicken Manure to The Garden Soil and Its Benefits Video
Now that our seedlings have been acclimated, and the soil has been prepared, it is time to plant them in the ground!
Transplanting The Seedlings
Best Location for The Seedlings
- Pick a sunny location with fertile soil that drains well and gets 6 to 8 hours of suns.
Excavate the Hole
- With a hand shovel, dig a hole large enough for the tube, and amend the soil with compost or other organic matter. In order to ensure a successful beginning for my seedlings, I prefer to include a few scoops of chicken manure fertilizer in the planting hole. This provides the plant with essential nutrients to grow and flourish, and that's all for all the growing season.
- Carefully place your seedling into the designated hole and fill around the seedlings with soil, with your hand gently make e pressure to confirm their firm placement.
- After successfully planting your seedling in its new location, it is important to give it a gentle watering. This will aid in the soil settling around the seedling, removing any trapped air pockets.
Once the seedlings are planted, the work is far from over. To ensure the successful establishment and growth of your sweet peas, here are some actions you can take!
Assistance
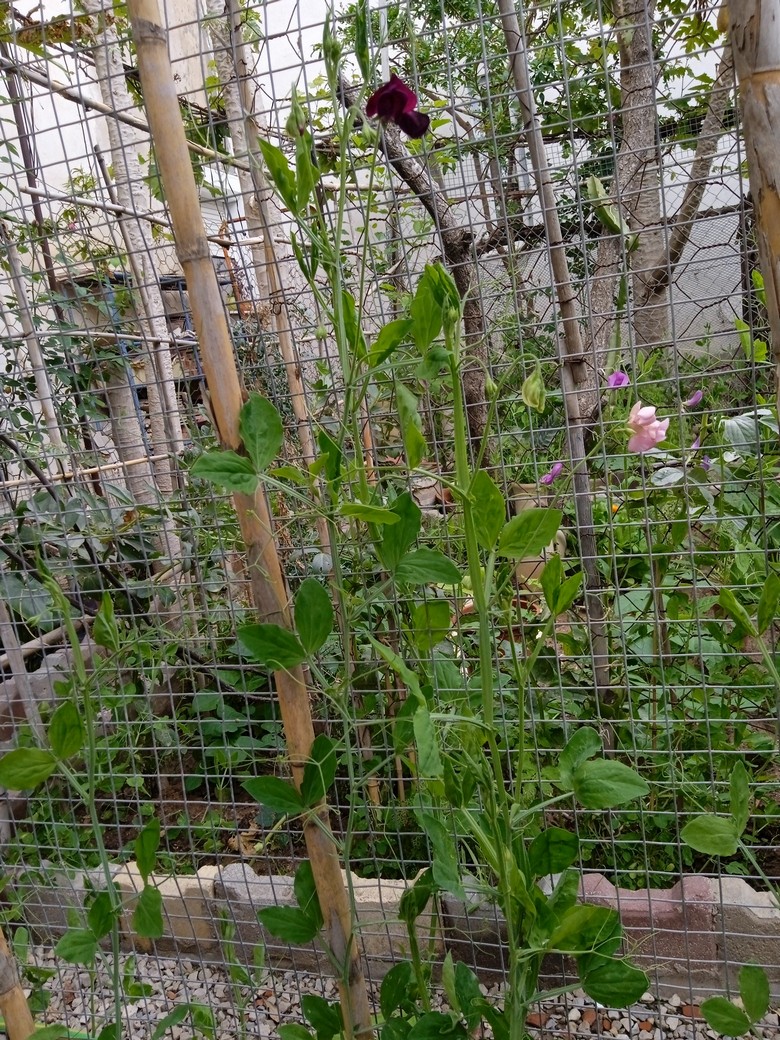
Sweet peas are natural climbers and will require some form of support in your garden. This can be achieved with a trellis, netting, or by using stakes and string. All of these options are suitable for providing the necessary support.
To support your sweet peas, you can utilize a cucumber trellis from Gardener's Supply in the shape of an A-frame. To make the most of the space in your raised bed, set it up horizontally, with the extended side positioned along the center. So far, it has proven to be an excellent choice.
To effectively grow sweet pea plants on a trellis, it is important to position the trellis or support system close to the recently transplanted sweet pea. To guide the vines to climb, gently tie the first few inches of the plant to the support. For this purpose, it is recommended to use soft plant ties, such as the ones found Decoroca Soft Plant Ties for Support, as they will not harm the stems like wire would.
As the plant continues to develop, it will instinctively rely on the support and climb towards the sunlight. The delicate tendrils can be observed entwined around the trellis structure in various spots as it progresses upwards.
Applying Fertilizer
Once the plants have been established, my suggestion is to nourish them using a balanced, slow-release fertilizer every four to six weeks during the growing period. This slow-release formula guarantees a continuous provision of nutrients to the plants gradually, instead of all at once.
In case the leaves begin to turn yellow or the growth of plants appears stunted, or they produce fewer flowers than anticipated, it may indicate a need for additional nutrients. However, caution must be exercised to avoid over-fertilization, as it can lead to its own complications.
Sweet peas don't typically need supplemental fertilizer because they fix their own nitrogen in the soil.
Pruning of withered blooms
As a flower wilts and perishes, the plant's attention shifts towards producing seeds. I decide at the end of summer to allow some of my sweet pea flowers to set seed, so I can collect them to plant the following year.
However, by removing these exhausted flowers while the plants are still growing, we can channel that energy towards producing fresh blossoms.
To effectively manage deadheading, it is recommended to regularly gather small bunches of sweet pea flowers. Though they may only remain fresh in a vase for a short period of time, the solution is simple - simply venture out to the garden and harvest more. Every snip serves as a form of pruning, encouraging more growth and ultimately resulting in more blossoms.
I hope this guide helps you learn how to transplant Sweet Peas seedlings started in paper toilet rolls indoors, into the garden, It's an easy and an eco-friendly way of organic gardening!
Don’t hesitate to ask questions or reach out with any suggestions. So please let us know your thoughts, experiences, or questions in the comments below. If you like this, you can share with your friends!
Watch In My Garden-Sweet Peas-Video
Explore these additional articles on growing sweet peas!
Watch Video:
Pin for later!
You Can Buy Sweet Pea Seeds From Here!
Affiliate Disclosure:
In transparency and compliance with legal guidelines, please be aware that some of the links on this site are affiliate links. These are carefully chosen products that I have personally used, tested, and genuinely recommend. When you click and make a purchase through these links, I may earn a small commission, at no additional cost to you.
This commission helps support the maintenance of this site, allowing me to continue providing valuable content and recommendations. Rest assured, my priority is to offer authentic and reliable information, and I only affiliate with products that align with the values and standards I uphold.
Your trust means everything to me, and I appreciate your support. If you have any questions or concerns, please feel free to reach out. Thank you for being a valued part of our community!


