Unearth the secret to cultivating your very own sweet potatoes just steps from your kitchen with a touch of homegrown magic!
In this guide, we delve into the art of planting sweet potato slips in containers, offering you a passport to a bountiful harvest right from your backyard.
Emphasize the advantages of container gardening for sweet potatoes, showcasing its versatility, space-saving benefits, and accessibility for urban dwellers or those with limited outdoor space. Let's dive into the sweet and satisfying world of growing sweet potatoes right in your own backyard. Imagine stepping outside your door to harvest your own homegrown tubers, bursting with flavor and packed with nutrients. Whether you're a seasoned gardener looking to expand your crop repertoire or a novice with a passion for fresh, wholesome produce, container gardening offers an exciting opportunity to cultivate sweet potatoes in a space-saving and accessible manner. Get ready to unlock the secrets of planting, nurturing, and harvesting sweet potato slips in containers as we embark on a journey filled with greenery, goodness, and the joy of homegrown abundance. Welcome to the sweet potato adventure of a lifetime! Are you ready to transform your backyard or balcony into a lush haven of homegrown goodness? Say goodbye to store-bought sweet potatoes and hello to your very own bountiful harvest, right from the convenience of your own container garden! In this blog, we're diving deep into the world of growing sweet potatoes in containers—a delightful journey that promises to awaken your inner gardener and tantalize your taste buds. Imagine stepping outside your door to pluck vibrant, nutrient-rich sweet potatoes from plants you nurtured from tiny slips. Get ready to plant, nurture, and harvest your way to sweet potato success—it's time to dig in!
Understanding Sweet Potato Slips
Sweet potato slips are young shoots that emerge from a mature sweet potato. They serve as the primary means of propagating sweet potatoes and play a crucial role in their growth cycle.
A. Significance of Sweet Potato Slips
Sweet potato slips are vital because they are the starting point for growing sweet potatoes. These slender shoots develop into vines, which, in turn, produce the tubers we harvest. Understanding how to care for and plant sweet potato slips is key to a successful harvest.
B. Obtaining Sweet Potato Slips
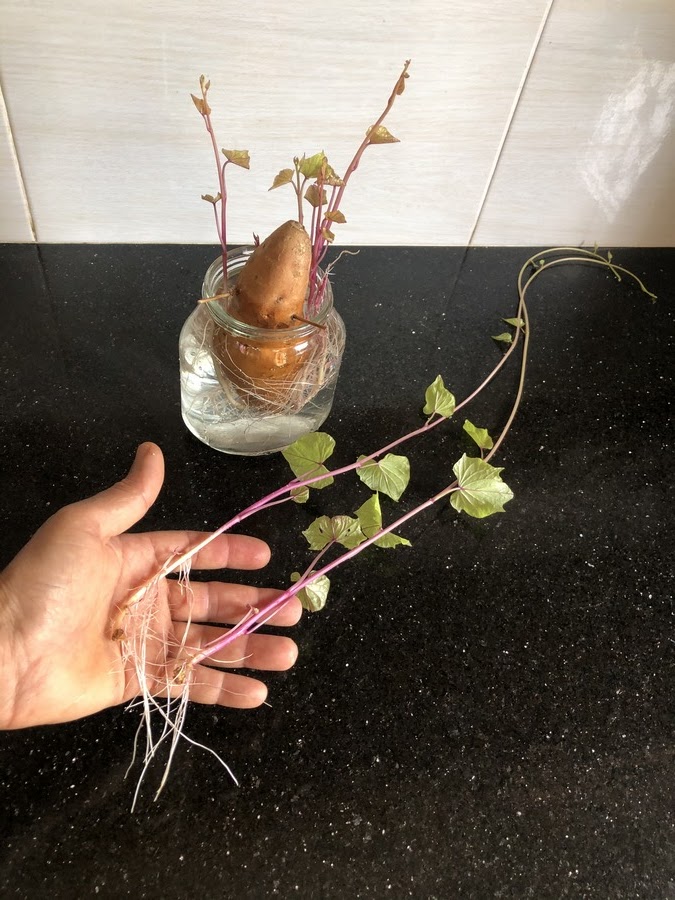
Purchasing Slips: Many gardening stores offer sweet potato slips for sale, typically in the spring. Look for reputable suppliers to ensure the quality and health of the slips. Propagating from Sweet Potatoes: Alternatively, you can produce your own slips from sweet potatoes. Select healthy, organic sweet potatoes and follow simple propagation methods, such as suspending the sweet potato in water until slips emerge.
Watch: Sweet Potato Magic: Grow Abundant Slips with this Simple Trick!
C. Selecting Healthy Slips
When choosing sweet potato slips, prioritize the following characteristics:
Vibrant Appearance: Look for slips that are vibrant green in color and free from signs of disease or damage. Strong Roots: Opt for slips with well-developed roots, as these are more likely to establish quickly when planted. Sturdy Stems: Select slips with sturdy, thick stems, as these indicate robust growth potential. By carefully selecting healthy slips, you set the stage for a successful sweet potato harvest.
Choosing the Right Container
Selecting the appropriate containers for growing sweet potatoes is crucial to ensure optimal growth and yield. Consider the following factors when choosing containers:
A. Importance of Suitable Containers
The right container provides adequate space for sweet potato vines to spread and develop tubers. It also facilitates proper drainage, moisture retention, and aeration, essential for healthy root growth.
B. Characteristics of an Ideal Container
Size: Opt for containers with a minimum volume of 10 gallons per plant to accommodate the sprawling growth habit of sweet potato vines. Larger containers, such as those with 20-30 gallons capacity, allow for more substantial yields. Depth: Choose containers with a depth of at least 12-18 inches to accommodate the long roots of sweet potatoes. Deeper containers promote the development of larger tubers. Material: Select containers made of durable, breathable materials such as plastic, ceramic, or fabric. Avoid containers that can overheat in direct sunlight, as this may damage the roots.
C. Alternative Container Options
Grow Bags: Fabric grow bags offer excellent drainage and aeration, promoting healthy root growth. They are lightweight, portable, and come in various sizes to suit different space constraints. Barrels or Tubs: Repurpose large barrels or tubs by drilling drainage holes in the bottom. These containers provide ample space for multiple sweet potato plants and can be placed on patios or balconies. Raised Beds: Construct raised beds with adequate depth and space between plants to accommodate sweet potato growth. Raised beds offer better drainage and allow for efficient utilization of space in the garden.
By selecting the right container and considering alternative options, you can create an ideal environment for growing sweet potatoes, even in limited space or urban settings.
Preparing the Container
Before planting sweet potato slips, it's essential to prepare the container properly to create an optimal growing environment.
A. Ensuring Adequate Drainage
Drainage Holes: Drill or create drainage holes in the bottom of the container to prevent waterlogging, which can lead to root rot. Ensure there are enough drainage holes spaced evenly across the base. Layer of Drainage Material: Place a layer of coarse gravel or small rocks at the bottom of the container to improve drainage and prevent soil from blocking the drainage holes. Elevated Placement: Elevate the container slightly using pot feet or bricks to allow excess water to flow freely from the drainage holes.
B. Proper Spacing Between Slips
Spacing Guidelines: Space sweet potato slips approximately 12-18 inches apart within the container. This allows each plant ample room to spread and develop without overcrowding. Arrangement: Position the slips evenly within the container, ensuring they are not too close to the edges. Leave space between the slips and the container walls to prevent overcrowding and promote airflow. Consider Container Size: Adjust the spacing based on the size of the container and the number of slips being planted. Larger containers can accommodate more slips, but maintain adequate spacing to avoid competition for resources.
C. Additional Considerations
Soil Preparation: Fill the container with a well-draining potting mix rich in organic matter, such as compost or aged manure. Avoid compacting the soil excessively, as it can hinder root growth. Sunlight Exposure: Place the container in a location that receives full sun, as sweet potatoes require at least 6-8 hours of sunlight per day for optimal growth.
By following these steps to prepare the container and ensuring proper spacing between slips, you create an ideal environment for healthy sweet potato growth and a bountiful harvest.
Preparing the Sweet Potato Slips
Preparing sweet potato slips for planting is a critical step in ensuring successful growth and a bountiful harvest. Follow these steps to prepare and encourage slip growth:
A. Curing and Storing Sweet Potatoes
Harvesting Sweet Potatoes: Harvest mature sweet potatoes carefully to avoid bruising or damaging the tubers. Curing: Cure the harvested sweet potatoes by placing them in a warm, humid environment (around 85°F with 80-90% humidity) for 1-2 weeks. This process allows the skins to thicken and heal, extending storage life and promoting healthy slip growth. Storage: After curing, store the sweet potatoes in a cool, dark location (around 55-60°F) with good ventilation to prevent rotting. Check regularly for signs of decay and remove any spoiled tubers.
B. Encouraging Slip Growth
Selecting Candidate Sweet Potatoes: Choose the healthiest, most robust sweet potatoes from your cured batch for sprouting slips. Preparing the Sweet Potatoes: Place the selected sweet potatoes in a warm, well-lit area (around 70-80°F) for 4-6 weeks to encourage the development of sprouts. Creating Ideal Conditions: To promote slip growth, suspend the sweet potatoes partially submerged in water or place them in a container filled with damp sand or vermiculite. Ensure that the top half of each sweet potato remains above the water or substrate. Monitoring Progress: Check the sweet potatoes regularly for signs of sprouting. Once the slips reach approximately 6-8 inches in length and have well-developed roots, they are ready for planting.
Watch: Understanding Sweet Potato Slips Video
C. Harvesting Slips
Carefully Remove Slips: Gently twist or cut the slips from the sweet potatoes, ensuring that each slip has a portion of the stem and roots intact. Prepare for Planting: Trim any excess leaves or roots from the slips to encourage vigorous growth when planted. Transplanting: Plant the slips in prepared containers, ensuring that the roots are well-covered with soil and the stems are positioned upright.
By following these steps to prepare sweet potato slips, you set the stage for successful planting and a thriving sweet potato crop.
Planting the Sweet Potato Slips
Planting sweet potato slips requires careful attention to detail to ensure successful establishment and growth. Follow these detailed instructions for planting sweet potato slips in containers:
A. Timing and Soil Temperature
Optimal Planting Time: Plant sweet potato slips after the danger of frost has passed and the soil has warmed to at least 60°F (16°C). Typically, this occurs in late spring or early summer, depending on your location. Soil Temperature: Measure the soil temperature using a soil thermometer to ensure it has reached the ideal range for sweet potato growth. Warm soil promotes vigorous root development and reduces the risk of transplant shock.
B. Planting Process
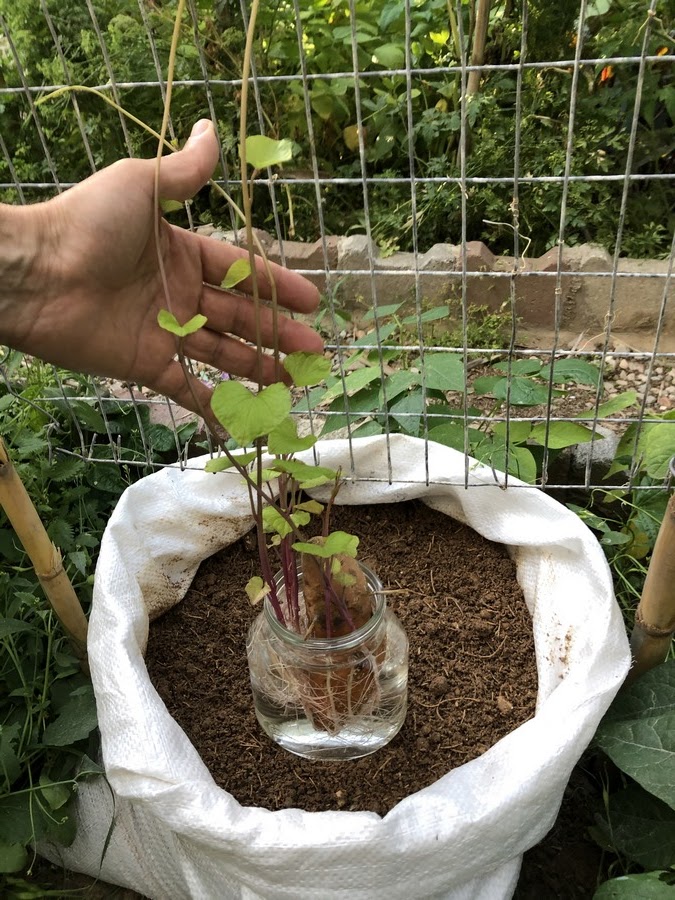
Prepare the Container: Ensure the container is prepared with adequate drainage and filled with well-draining potting mix. Dig Planting Holes: Using a trowel or your hands, create planting holes in the soil deep enough to accommodate the roots of the sweet potato slips. Space the holes approximately 12-18 inches apart, depending on the size of the container.
Positioning the Slips: Place each sweet potato slip vertically in a planting hole, ensuring that the roots are spread out and covered with soil. Leave the top portion of the slip, including the leaves, exposed above the soil surface. Burying the Slips: Gently backfill the planting holes with soil, pressing lightly to ensure good soil-to-root contact. Ensure that the slips are firmly anchored in the soil but avoid compacting the soil excessively. Watering: After planting, water the container thoroughly to settle the soil around the roots and provide moisture to the newly planted slips. Avoid overwatering, as this can lead to waterlogging and root rot. Mulching: Apply a layer of organic mulch, such as straw or shredded leaves, around the base of the slips to conserve moisture, suppress weeds, and regulate soil temperature.
C. Maintenance
Watering: Keep the soil consistently moist but not waterlogged throughout the growing season, especially during hot, dry periods. Fertilizing: Apply a balanced fertilizer formulated for vegetables according to the manufacturer's instructions to provide essential nutrients for healthy growth and development. Monitoring: Monitor the container regularly for signs of pests, diseases, or nutrient deficiencies, and take appropriate action as needed.
By following these planting instructions and providing proper care, you can ensure the successful establishment and growth of sweet potato slips in containers, leading to a productive harvest.
Providing Care and Maintenance
Ensuring proper care and maintenance is essential for the healthy growth and development of sweet potato plants in containers. Follow these guidelines to nurture your sweet potato crop:
A. Watering
Consistent Moisture: Maintain consistent moisture levels in the soil by watering the container regularly, especially during dry periods. Aim to keep the soil evenly moist but not waterlogged, as excessive moisture can lead to root rot. Deep Watering: Water deeply to encourage deep root growth, ensuring that the water reaches the root zone of the sweet potato plants. Avoid Overhead Watering: Avoid watering the foliage directly, as wet leaves can increase the risk of fungal diseases. Instead, water the soil around the base of the plants.
B. Fertilizing
Balanced Fertilizer: Apply a balanced fertilizer formulated for vegetables according to the manufacturer's instructions. Fertilize the sweet potato plants regularly throughout the growing season to provide essential nutrients for healthy growth and development. Avoid Excessive Nitrogen: Avoid excessive nitrogen fertilization, as it can promote lush foliage growth at the expense of tuber development.
C. Monitoring and Adjusting Care
Regular Monitoring: Monitor the sweet potato plants regularly for signs of pests, diseases, or nutrient deficiencies. Inspect the foliage, stems, and tubers for any abnormalities. Adjust Care Accordingly: Adjust watering, fertilizing, and other care practices based on the specific needs of the plants and any observed issues. Prompt action can help prevent problems from worsening.
D. Addressing Common Problems
Pests: Control common pests such as sweet potato weevils, aphids, and spider mites by using insecticidal soaps, neem oil, or other appropriate insecticides. Remove and destroy infested plant material to prevent the spread of pests. Diseases: Prevent fungal diseases such as Fusarium wilt and powdery mildew by ensuring good air circulation around the plants and avoiding overhead watering. Treat infected plants with fungicides as needed. Nutrient Deficiencies: Address nutrient deficiencies, such as potassium or magnesium, by applying foliar sprays or soil amendments containing the deficient nutrients. Adjust fertilizer applications accordingly to maintain proper nutrient levels.
By providing proper care and promptly addressing any issues that arise, you can ensure the health and productivity of your sweet potato plants throughout the growing season
Monitoring Growth and Harvesting
Monitoring the growth of sweet potato plants in containers is crucial to ensure optimal development and a successful harvest. Follow these steps to monitor growth progress and harvest sweet potatoes:
A. Monitoring Growth Progress
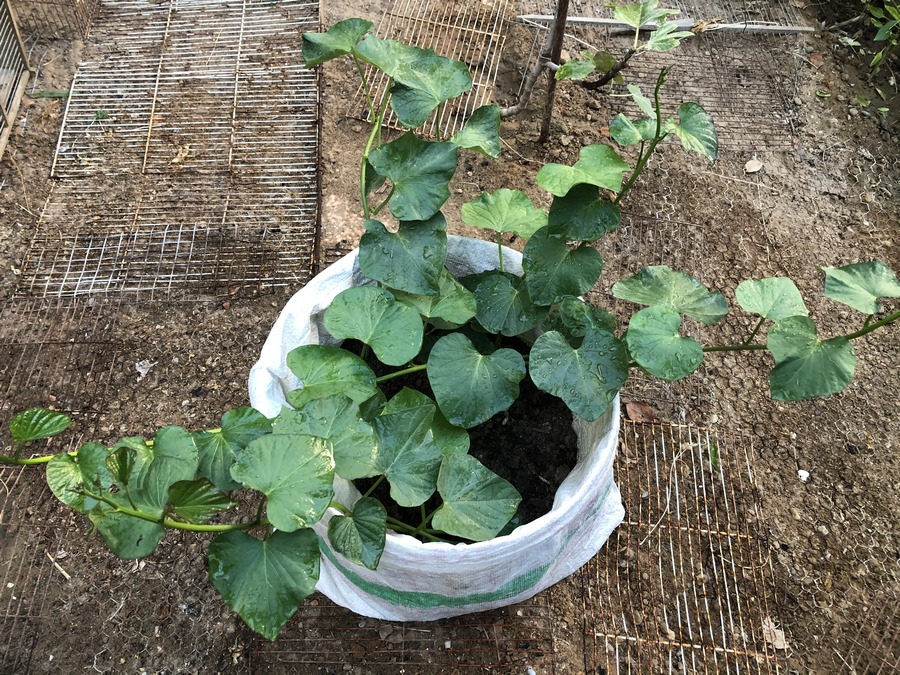
Observation: Regularly observe the growth of the sweet potato vines, noting any changes in foliage color, size, or overall appearance. Vine Growth: Sweet potato vines typically grow vigorously, spreading outwards and covering the surface of the container. Monitor vine growth to assess the overall health and vigor of the plants. Tuber Development: Monitor the development of tubers beneath the soil surface by gently digging around the base of the plants to inspect the size and formation of the sweet potatoes.
B. Signs of Readiness for Harvest
Maturity: Sweet potatoes are ready for harvest approximately 90-120 days after planting, depending on the variety and growing conditions. Foliage Senescence: As the sweet potatoes near maturity, the foliage may start to yellow and wither. This is a natural sign that the plants are preparing for harvest. Tuber Size: Mature sweet potatoes typically have well-developed tubers with a firm texture. The tubers should reach their full size and show no signs of further expansion. Skin Color: The skin of mature sweet potatoes may darken or develop a cured appearance, indicating readiness for harvest.
C. Harvesting Techniques
Prepare for Harvest: Stop watering the sweet potato plants a few days before harvest to allow the soil to dry slightly, making it easier to dig up the tubers. Digging: Carefully dig around the base of the sweet potato plants using a garden fork or shovel, being cautious not to damage the tubers. Lift the plants gently from the container, shaking off excess soil. Harvesting Tubers: Locate the tubers beneath the soil surface and gently remove them from the vines, taking care to avoid bruising or damaging the tubers. Curing: After harvesting, cure the sweet potatoes by placing them in a warm, humid environment (around 85°F with 80-90% humidity) for 1-2 weeks. This process allows the skins to thicken and heal, enhancing storage life and flavor.
By monitoring growth progress, identifying signs of readiness for harvest, and employing proper harvesting techniques, you can maximize the yield and quality of sweet potatoes grown in containers.
Tips and Tricks for Successful Container Gardening
Maximize your success with container-grown sweet potatoes using these additional tips and tricks:
A. Container Gardening Tips
Choose Compact Varieties: Opt for compact or bush-type sweet potato varieties suited for container gardening to maximize space and yield. Regular Maintenance: Maintain consistent care routines, including watering, fertilizing, and pest control, to ensure the health and productivity of sweet potato plants. Support Vines: Provide support for sprawling sweet potato vines by installing trellises or stakes in the container to prevent them from spilling over and crowding neighboring plants. Rotate Containers: Rotate containers periodically to ensure even sunlight exposure and prevent uneven growth or shading among plants.
B. Companion Planting Options
Companion Plants: Companion planting with herbs such as basil, oregano, or thyme can help repel pests and attract beneficial insects to the container garden. Nitrogen-Fixing Plants: Plant nitrogen-fixing legumes such as peas or beans nearby to help improve soil fertility and promote healthy growth of sweet potatoes.
C. Overcoming Challenges
Soil Compaction: Prevent soil compaction by regularly aerating the soil in containers using a garden fork or by incorporating perlite or vermiculite into the potting mix to improve soil structure. Pest Control: Implement integrated pest management strategies, such as handpicking pests, applying organic pesticides, or introducing beneficial insects, to control common pests without harming beneficial organisms. Disease Prevention: Practice good sanitation practices, such as removing and disposing of diseased plant material, to prevent the spread of fungal diseases. Ensure proper air circulation around plants and avoid overhead watering to reduce humidity and minimize disease risk. Nutrient Management: Monitor soil nutrient levels and adjust fertilization as needed to prevent nutrient deficiencies or excesses, which can impact plant growth and productivity.
By implementing these tips and tricks, you can overcome challenges and maximize the success of your container-grown sweet potatoes, enjoying a bountiful harvest of homegrown goodness. Conclusion
Embarking on a sweet potato growing adventure in containers opens up a world of homegrown possibilities right in your backyard. Let's recap the key steps and considerations for planting sweet potato slips in containers:
Selecting Sweet Potato Slips: Choose healthy slips from reputable sources or propagate your own from cured sweet potatoes. Choosing the Right Container: Opt for containers with adequate size, depth, and drainage to accommodate sweet potato growth. Preparing the Container: Ensure proper drainage and spacing for optimal growth and development of sweet potato plants. Preparing Sweet Potato Slips: Encourage slip growth from cured sweet potatoes by providing ideal conditions for sprouting. Planting Sweet Potato Slips: Position slips vertically in the container, burying the roots and leaving the foliage exposed. Providing Care and Maintenance: Water and fertilize regularly, monitor for pests and diseases, and adjust care as needed to promote healthy growth. Monitoring Growth and Harvesting: Monitor vine and tuber growth, and harvest sweet potatoes when mature and ready.
Growing sweet potatoes in containers offers a plethora of benefits, making it an excellent choice for gardeners seeking versatility, space-saving solutions, and accessibility, particularly in urban or small spaces. The advantages are abundant, making it the right time for you to embark on your own sweet potato growing journey within the confines of containers. With a dedicated approach, meticulous attention to detail, and the valuable advice provided within this comprehensive guide, you can confidently cultivate a plentiful harvest of sweet potatoes that are guaranteed to tantalize your taste buds and bring about a sense of joy and accomplishment. Container gardening offers the flexibility to fit within any living environment, allowing you to optimize every inch of available space, whether it be a balcony, patio, or even a windowsill. The controlled environment within containers allows for a greater degree of management, including the ability to monitor sunlight exposure, soil moisture levels, and optimal growing conditions. Not only do containers provide the freedom to position your sweet potato plants strategically, but they also enable easy mobility, allowing you to shift their location if necessary. Additionally, container gardening reduces the risk of soil-borne diseases and pests, offering a protective barrier for your sweet potato crop. The rewards of your efforts will be bountiful, as you patiently watch your sweet potato vines flourish, and eventually, harvest a batch of delightful, homegrown tubers that will not only satiate your culinary cravings but also invigorate your soul. So, gather your determination, equip yourself with the knowledge found in this guide, and let the journey of growing sweet potatoes in containers begin. Happy gardening!
Watch: Ultimate Guide: Planting Sweet Potato Slips in Containers!
Can I grow sweet potatoes in containers?
Yes, sweet potatoes can be successfully grown in containers, making them an excellent option for gardeners with limited space or those looking to maximize their harvest in a controlled environment. What size container do I need for growing sweet potatoes?
Aim for containers with a minimum volume of 10 gallons per plant to accommodate the sprawling growth habit of sweet potato vines. Larger containers, such as those with 20-30 gallons capacity, allow for more substantial yields.
When should I plant sweet potato slips in containers?
Plant sweet potato slips in containers after the danger of frost has passed and the soil has warmed to at least 60°F (16°C), typically in late spring or early summer.
How do I prepare sweet potato slips for planting?
Prepare sweet potato slips by selecting healthy, cured sweet potatoes and encouraging sprout growth in a warm, well-lit environment. Once slips have developed roots and reached 6-8 inches in length, they are ready for planting.
How deep should I plant sweet potato slips in containers?
Plant sweet potato slips in containers at a depth where the roots are spread out and covered with soil, leaving the top portion of the slip, including the leaves, exposed above the soil surface.
How often should I water sweet potato plants in containers?
Water sweet potato plants in containers regularly to maintain consistent moisture levels in the soil, especially during dry periods. Aim to keep the soil evenly moist but not waterlogged.
Do sweet potato plants need fertilizer?
Yes, sweet potato plants benefit from regular fertilization throughout the growing season. Apply a balanced fertilizer formulated for vegetables according to the manufacturer's instructions to provide essential nutrients for healthy growth and development.
How do I know when sweet potatoes are ready to harvest?
Sweet potatoes are typically ready for harvest approximately 90-120 days after planting. Look for signs such as yellowing foliage, mature tubers with firm texture, and darkened or cured skin.
What pests and diseases should I watch out for when growing sweet potatoes in containers?
Common pests include sweet potato weevils, aphids, and spider mites, while diseases such as Fusarium wilt and powdery mildew can affect sweet potato plants. Implement integrated pest management strategies and good sanitation practices to prevent and manage these issues. Can I reuse the soil in my containers after harvesting sweet potatoes?
Yes, you can reuse the soil in containers for subsequent plantings, but it's essential to replenish nutrients by amending the soil with compost or organic matter before planting again. Rotate crops to prevent nutrient depletion and reduce the risk of pests and diseases.
Want to grow sweet potatoes? Sweet Potato Seeds, 50Pcs Purple Sweet Potato YEGAOL Garden 50Pcs Sweet Potato Seeds Non-GMO Organic Sweet Nutrition Delicious Best Sellers in Fresh Sweet Potatoes
Pinfor later!
Affiliate Disclosure:


