Luffa sponges are a great natural alternative to synthetic bath sponges. They're eco-friendly, biodegradable, and gentle on the skin. But did you know that luffa sponges are actually grown from a plant? Yes, the same plant that produces the edible vegetable, the cucumber, also produces the luffa sponge! Growing and harvesting luffa sponges can be a fun and rewarding experience for any gardener. In this post, we'll cover everything you need to know about growing, harvesting, and processing luffa sponges. Read on to find out more about this intriguing plant and how it can be turned into a calming spa experience, regardless of your level of gardening skill. You will get all the information you need to grow your own luffa sponges and make them into opulent bath accessories.
1. Introduction to Luffa sponges and their benefits
Loofahs, also known as luffa sponges, have become increasingly popular in recent years due to their amazing adaptability and many advantages. Despite what the general public may think, luffa sponges are not made from seawater; rather, they come from a plant in the cucumber family called Luffa cylindrica. These unusual sponges provide a natural and environmentally friendly substitute for synthetic bath sponges, which makes them a favorite among consumers looking for sustainable and organic options.
One of the key benefits of luffa sponges is their exfoliating properties. The rough texture of the dried luffa fibers gently scrubs away dead skin cells, leaving your skin rejuvenated and glowing. This natural exfoliation promotes healthy blood circulation and can even help prevent ingrown hairs, making luffa sponges a must-have for your skincare routine.
In addition to exfoliation, luffa sponges are highly absorbent, allowing them to create a rich lather with your favorite soap or body wash. This ensures a thorough cleansing experience, reaching deep into your pores to remove dirt, oil, and impurities. The gentle yet effective cleansing action of luffa sponges makes them suitable for all skin types, including sensitive skin.
Another remarkable benefit of luffa sponges is their sustainability. Unlike synthetic sponges that contribute to plastic waste, luffa sponges are completely biodegradable and compostable. From the vine to the spa, the entire lifecycle of luffa sponges is environmentally friendly, making them an ideal choice for those striving to reduce their carbon footprint.
Furthermore, luffa sponges have a multitude of uses beyond skincare. They can be repurposed as kitchen scrubbers, household cleaning tools, or even as natural plant supports in your garden. They are a more affordable and environmentally friendly option than single-use items because of their adaptability and endurance.
This in-depth guide will equip you with the knowledge and techniques to incorporate luffa sponges into your daily life, whether you are an avid gardener, a skincare enthusiast, or just curious about this natural wonder. Together, we will delve into the fascinating world of luffa sponges, covering everything from growing and harvesting the luffa plant to processing and preparing the sponges for use.Get ready to discover the wonders of luffa sponges and unlock a world of sustainable self-care.
2. Understanding the Luffa plant and its growth requirements
The sponge gourd, or luffa plant, is an interesting vine that has both aesthetic appeal and practical uses.
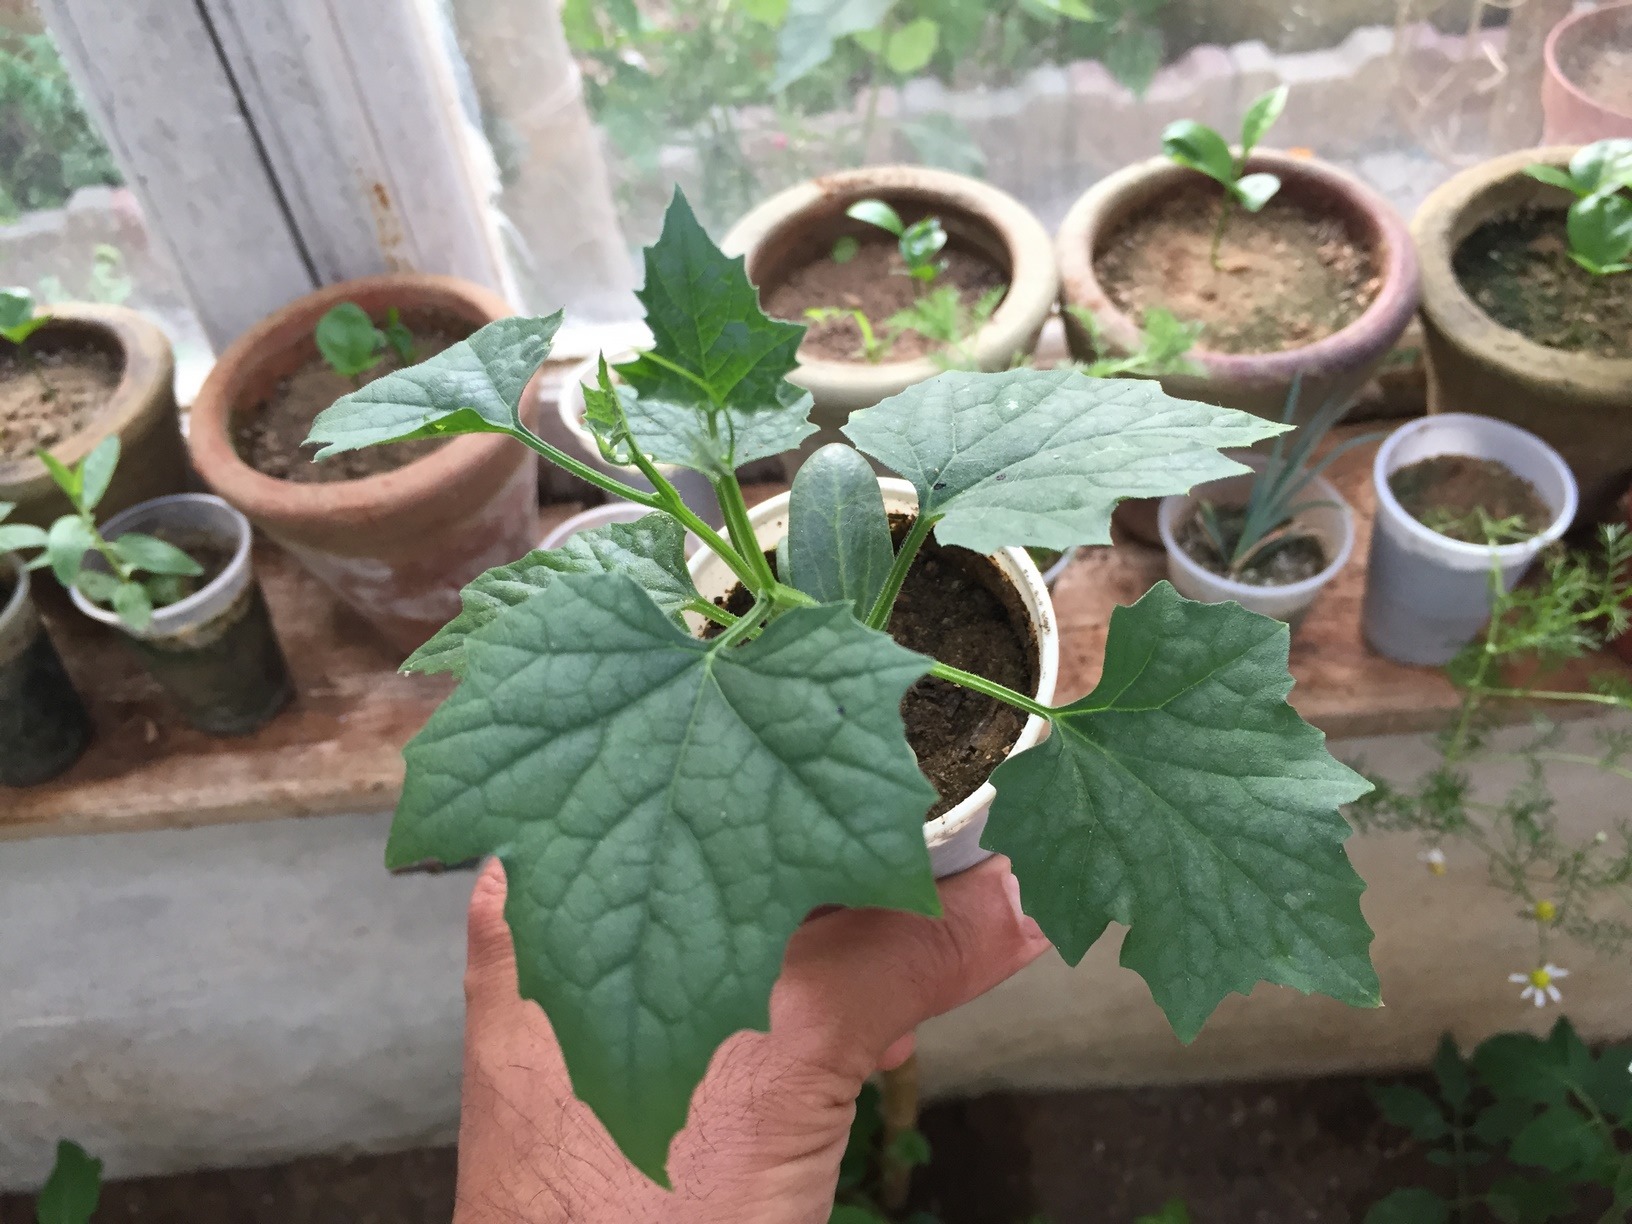
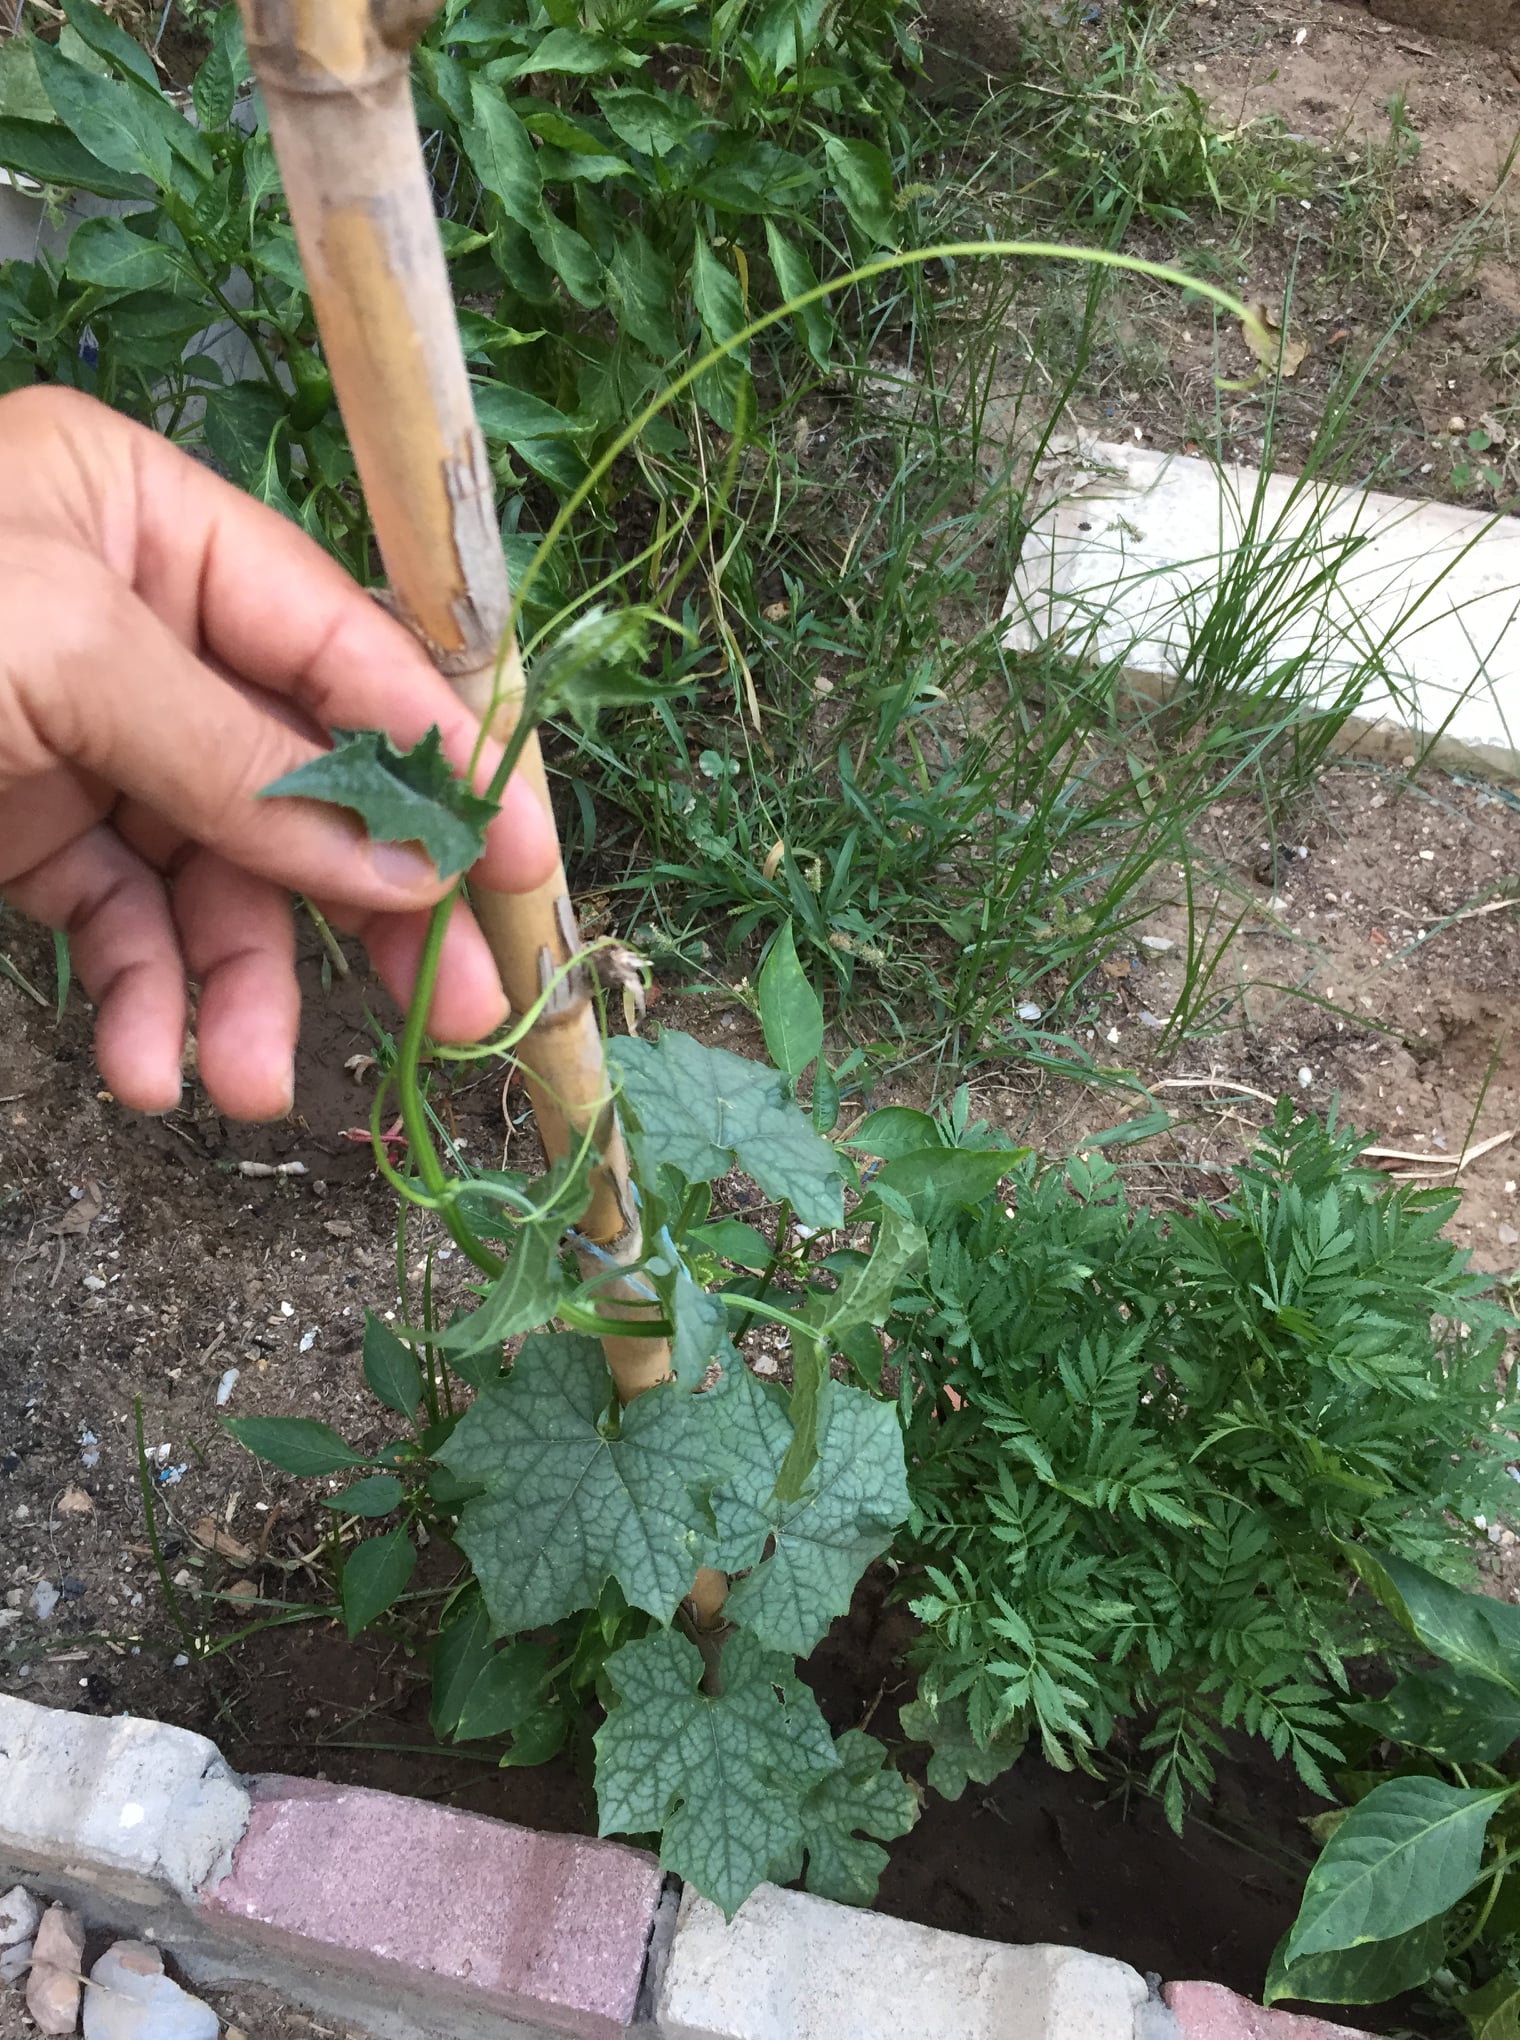
Strong support structures are necessary for luffa plants because they are climbers. You can support the vines vertically by using a trellis, fence, or arbor. Plants should be spaced 2 to 3 feet apart to allow for proper air circulation and lower the risk of disease.
Watering is crucial for the healthy growth of luffa plants. They require consistent moisture, especially during the flowering and fruiting stages. But be careful not to overwater; too much moisture might cause fungal infections or root rot. Regular watering, allowing the soil to dry slightly between watering sessions, is recommended.
Understanding these growth requirements of the luffa plant sets the foundation for successful cultivation. By providing the right environmental conditions, you can ensure robust growth and an abundant harvest of luffa sponges, ready to be transformed into natural and eco-friendly bathing essentials.
3. Step-by-step guide to growing Luffa vines in your garden
This is a step-by-step guide to help you successfully grow Luffa vines and harvest your own luffa sponges. Growing Luffa vines in your garden can be a great and fascinating experience. These adaptable plants not only add a touch of greenery to your outdoor space but also produce unique and natural sponges that can be used in a variety of ways.1. Choose the right location: Luffa vines thrive in warm and sunny conditions, so select a spot in your garden that receives at least six to eight hours of direct sunlight daily. Ensure the soil is well-drained and rich in organic matter.
2. Prepare the soil: Before planting, prepare the soil by removing any weeds or debris. Loosen the soil and amend it with compost or well-rotted manure to improve its nutrient content and drainage.
Watch Adding Chicken Manure to The Garden Soil and Its Benefits Video
4. Transplant outdoors: Once all danger of frost has passed and the seedlings have developed a few sets of true leaves, they are ready to be transplanted outdoors. Choose a mild and calm day for transplanting to minimize stress on the young plants. Space the seedlings about 3-5 feet apart to allow room for the vines to spread. 5. Provide support: Luffa vines are vigorous climbers and require sturdy support structures. Install trellises, fences, or other vertical structures that can accommodate the growth of the vines. As the plants start to climb, gently guide the tendrils to help them attach to the support.
6. Water and fertilize: Luffa vines prefer consistent moisture but avoid overwatering, as it can lead to root rot. Water deeply when the top inch of soil feels dry. Apply a balanced organic fertilizer every couple of weeks to promote healthy growth. 7. Keep an eye out for pests and diseases: Regularly check your plants for any signs of damage or disease, and take the required action to control any common garden pests like aphids, spider mites, and cucumber beetles.8. Harvesting: Luffa sponges are ready to be harvested when the fruit turns yellow or brown and feels lightweight. Use a sharp knife or pruning shears to cut the mature fruits from the vine. Leave a few inches of the stem attached to the fruit for easier handling. You may cultivate Luffa vines in your garden and reap the benefits of harvesting your own luffa sponges by following these procedures. Keep an eye out for the next phase of our tutorial, where we will discuss how to process and prepare these sponges for different applications.
4. Tips for proper care and maintenance of Luffa plants
Proper care and maintenance of Luffa plants are essential to ensure a bountiful harvest of high-quality sponges. Here are some tips to help you keep your Luffa plants thriving:1. Temperature and Sunlight: Luffa plants prefer temperatures between 70 and 90 degrees Fahrenheit (21 and 32 degrees Celsius), so make sure to provide them with a warm and sheltered environment. They need at least six to eight hours of direct sunlight per day, so make sure to plant them in an area where they can receive plenty of sunlight throughout the day.
2. Soil and Watering: Luffa plants prefer well-draining soil that is rich in organic matter. Before planting, prepare the soil by adding compost or well-rotted manure to improve its fertility. The soil pH should be slightly acidic to neutral, ideally between 6.0 to 7.5. Regular watering is crucial for Luffa plants, especially during hot and dry periods. However, be cautious not to overwater as it may lead to root rot. Water the plants deeply once or twice a week, allowing the soil to dry out slightly between waterings.
3. Support and Training: Luffa plants are vigorous climbers that require sturdy support structures. Install trellises, fences, or other vertical supports to guide the vines as they grow. This will prevent the vines from sprawling on the ground and protect the developing sponges from potential damage. Regularly train the vines onto the support structure, redirecting them as necessary to promote vertical growth.
4. Pruning and Maintenance: Regular pruning is essential to maintain the health and productivity of Luffa plants. Remove any dead or diseased leaves, stems, or fruits to prevent the spread of pests and diseases. Pruning also helps improve air circulation and sunlight penetration into the plant, reducing the risk of fungal infections. Additionally, you can trim the vines to control their growth and prevent overcrowding.
5. Pest and Disease Management: Luffa plants are generally resistant to pests and diseases. However, occasional issues may arise, such as aphids, spider mites, or powdery mildew. Monitor your plants regularly and take appropriate measures if you notice any signs of infestation or disease. Organic insecticides or homemade remedies like neem oil can be used to treat pests, while proper spacing, adequate airflow, and avoiding overhead watering can help prevent fungal infections.
By following these care and maintenance tips, you can ensure that your Luffa plants thrive and produce an abundant harvest of healthy and high-quality sponges. With a little attention and care, you'll be well on your way to enjoying the satisfaction of growing, harvesting, and processing your own Luffa sponges.
5. Identifying the right time for harvesting Luffa sponges
Identifying the right time for harvesting Luffa sponges is crucial to ensure optimal quality and effectiveness. These incredible natural sponges, derived from the fibrous interior of mature Luffa plants, have a variety of uses ranging from exfoliating the skin to household cleaning.
To determine the ideal time for harvesting, it is important to closely monitor the growth and development of the Luffa plants. Typically, Luffa sponges are ready to be harvested when they have reached full maturity and are completely dried out on the vine.
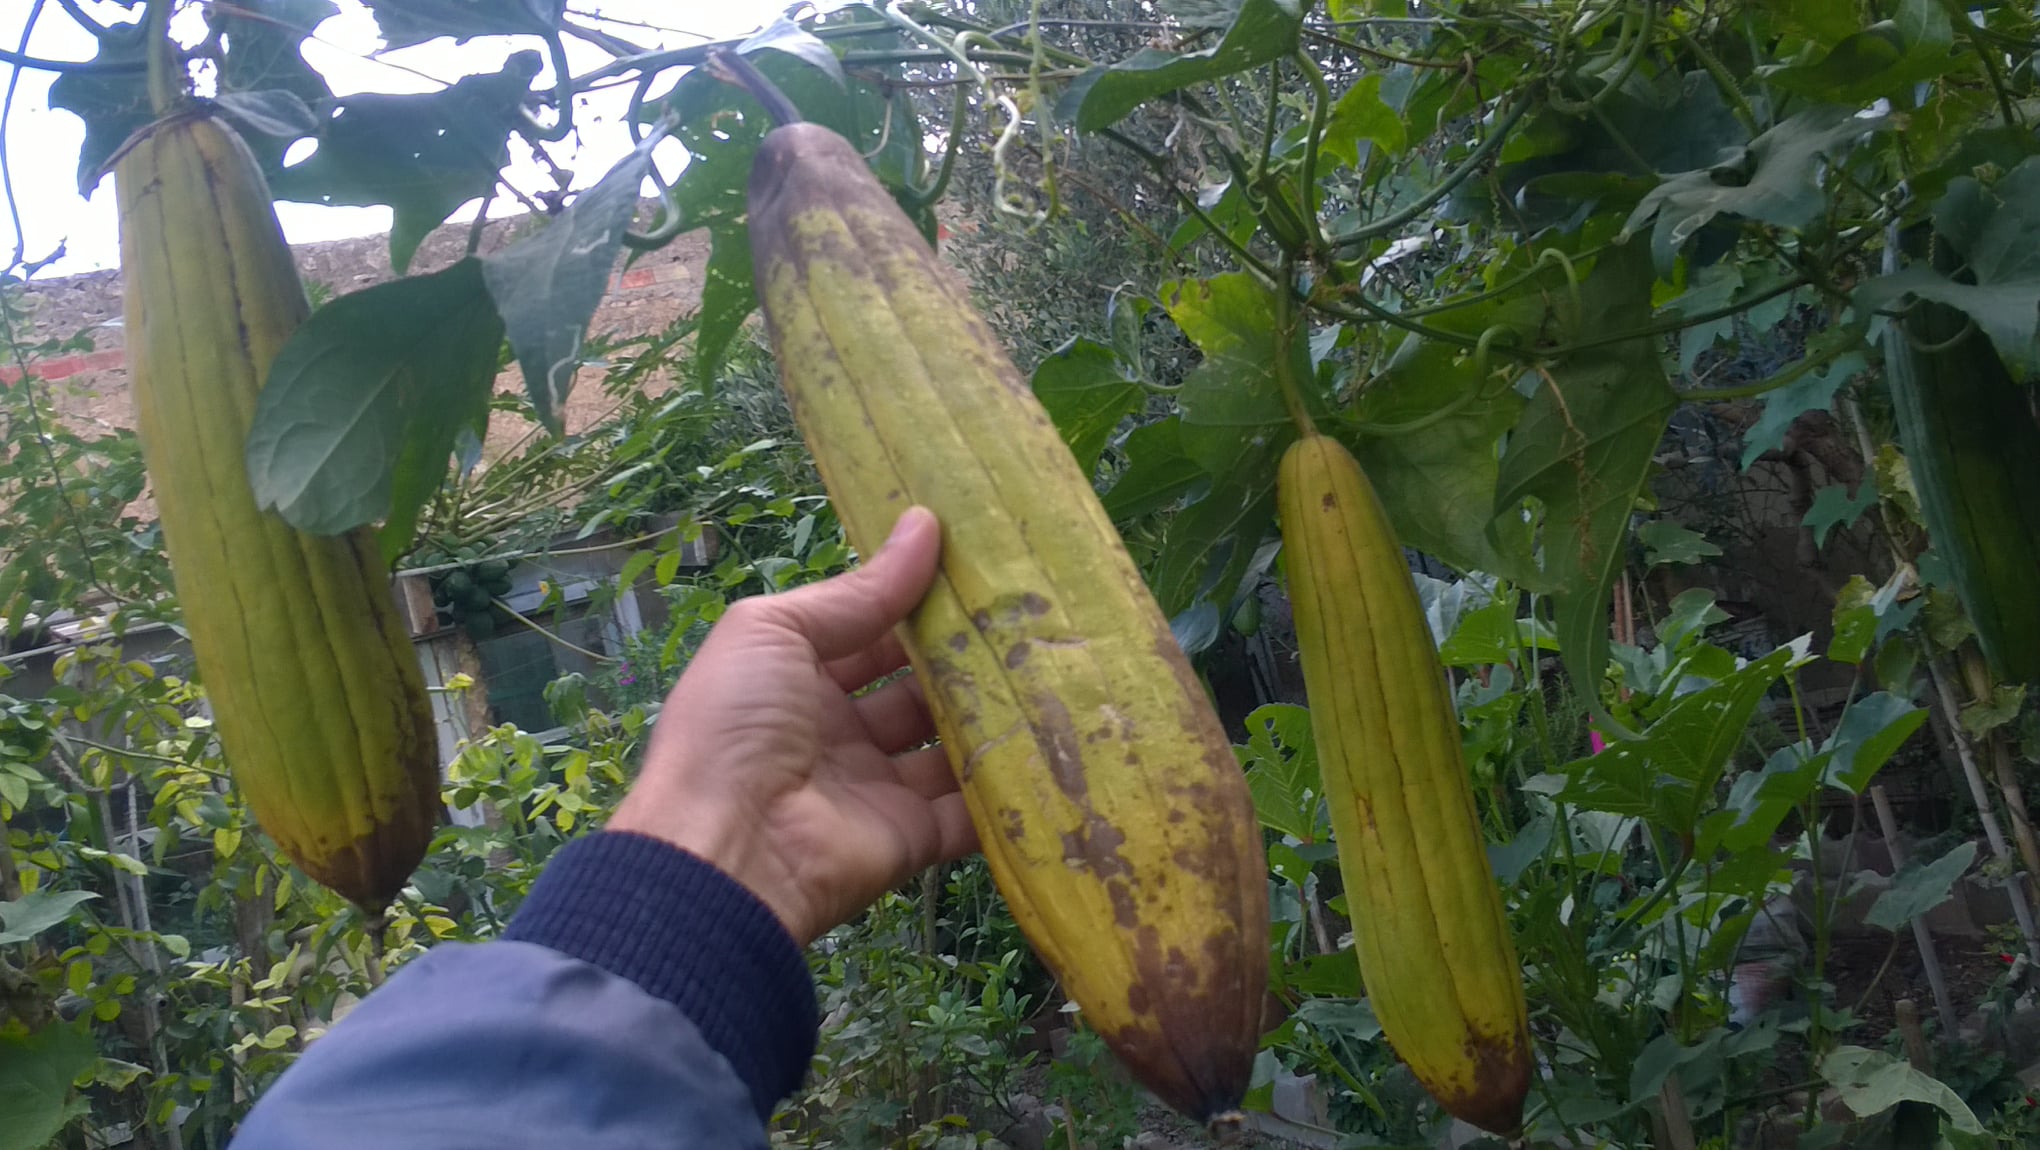
One key indicator to look for is a change in color. As the Luffa sponge matures, it transitions from green to a light yellow or brown hue. This color change signifies that the sponge is nearing its prime harvesting stage.
Another important factor to consider is the texture of the Luffa sponge. When gently squeezed, a mature sponge should feel firm and rigid, indicating that it has dried out and is ready for harvesting. On the contrary, if the sponge feels soft or pliable, it is likely still in the early stages of development and should be left on the vine to continue drying.
Timing is crucial when it comes to harvesting Luffa sponges. If harvested too early, the sponge may not have fully developed its fibrous structure, resulting in a less effective product. On the other hand, if left on the vine for too long, the sponge may become overly mature, making it challenging to remove the outer skin during processing. To determine the ideal time for harvesting, it is important to closely monitor the growth and development of the Luffa plants. Typically, Luffa sponges are ready to be harvested when they have reached full maturity and are completely dried out on the vine.
Therefore, it is recommended to closely monitor the Luffa plants and harvest the sponges when they have achieved the desired color, texture, and level of dryness. This will ensure that you obtain high-quality Luffa sponges that are ready for further processing and utilization.
You may increase the quantity and quality of your harvest and, eventually, improve the success of your Luffa sponge production by learning the art of determining the ideal time to harvest Luffa sponges.
6. Techniques for harvesting Luffa sponges without damaging them
When it comes to harvesting Luffa sponges, it's crucial to handle them with care to avoid any damage. Follow these techniques to ensure a successful harvest without compromising the quality of your Luffa sponges.
Firstly, it's important to wait until the Luffa gourds have fully matured on the vine.Firstly, it's important to wait until the Luffa gourds have fully matured on the vine. This is typically indicated by a change in color from green to a yellowish hue and a hardening of the outer skin. Harvesting them prematurely can result in underdeveloped sponges that may not have the desired texture and durability. To begin the harvesting process, use a sharp pair of pruning shears or a knife to cut the Luffa gourds from the vine.
To begin the harvesting process, use a sharp pair of pruning shears or a knife to cut the Luffa gourds from the vine. Be careful not to apply excessive force, as this can cause unnecessary damage. Ideally, leave a few inches of the stem attached to the sponge, as this can help with the drying process. After harvesting, gently remove any remaining leaves or debris from the Luffa gourds.
After harvesting, gently remove any remaining leaves or debris from the Luffa gourds. Rinse them with clean water to remove any dirt or insects that may be present on the outer surface. Take care not to scrub or rub the sponges too vigorously, as this can result in tearing or bruising. Next, it's time to prepare the Luffa gourds for drying.
Next, it's time to prepare the Luffa gourds for drying. One method is to soak them in warm water for approximately 24 hours. This can help soften the outer skin and make it easier to remove later. Alternatively, depending on your preferences and the state of the gourds, you can skip the soaking phase and move straight to peeling off the outer skin.
To peel the Luffa gourds, start by making a lengthwise incision along the entire length of the sponge. Using your fingers, gently pull apart the skin from the underlying fibrous network. Take your time and be patient, as rushing this step can lead to tearing or damage to the sponge.
Once you have successfully peeled off the outer skin, rinse the Luffa sponges again to remove any remaining residue. Squeeze out excess water and hang them to dry in a well-ventilated area with good air circulation. Avoid direct sunlight, as this can cause the sponges to become brittle.
Allow the Luffa sponges to dry completely, which can take anywhere from a few days to a couple of weeks, depending on the humidity and airflow in your drying location. Test their readiness by gently pressing on the sponges – they should feel firm and dry to the touch. By employing these techniques for harvesting Luffa sponges, you can ensure a successful and damage-free harvest. Remember, gentle handling and proper drying are key to preserving the integrity and quality of your Luffa sponges, ultimately enhancing their usability and appeal.
By employing these techniques for harvesting Luffa sponges, you can ensure a successful and damage-free harvest. Remember, gentle handling and proper drying are key to preserving the integrity and quality of your Luffa sponges, ultimately enhancing their usability and appeal.
7. Preparing Luffa sponges for processing and cleaning
Preparing Luffa sponges for processing and cleaning is a crucial step in ensuring the highest quality end product. After harvesting the mature Luffa gourds from the vine, it's time to get them ready for the next stage of the process.First, carefully remove the outer skin of the Luffa gourd. This can be done by soaking the gourds in warm water for a few hours to soften the skin. Once softened, gently peel off the outer skin using a knife or your hands. The skin will come off easily, revealing the fibrous interior of the Luffa.
Next, rinse the Luffa thoroughly under running water to remove any remaining dirt or debris. Pay close attention to the crevices and corners of the sponge to ensure a thorough cleaning. You can use a soft brush or your fingers to gently scrub the surface of the Luffa.
After rinsing, it's time to sanitize the Luffa. This is an essential step to ensure that the sponge is free from any bacteria or contaminants. You can use a mild bleach solution or hydrogen peroxide to soak the Luffa for about 15-20 minutes. Alternatively, you can also use steam or boiling water to sanitize the Luffa. Whichever method you choose, make sure to follow proper safety precautions.
Once the Luffa has been sanitized, rinse it again under running water to remove any residual cleaning solution. Squeeze out excess water and hang the Luffa in a well-ventilated area to dry completely. It's important to ensure that the Luffa is completely dry before proceeding to the next step.
Now that the Luffa sponge is prepared and cleaned, it's ready for further processing. Depending on your desired end product, you can cut the Luffa into smaller sections, remove any remaining seeds, or shape it into different forms. The possibilities are endless!
Whether you are using Luffa sponges for personal care, cleaning the house, or even as a unique gift, you can be sure that you have a high-quality and hygienic product by following these steps for preparation and cleaning. Your efforts in processing and cleaning will be evident in the final result.
8. Different methods for processing Luffa sponges, including drying and peeling
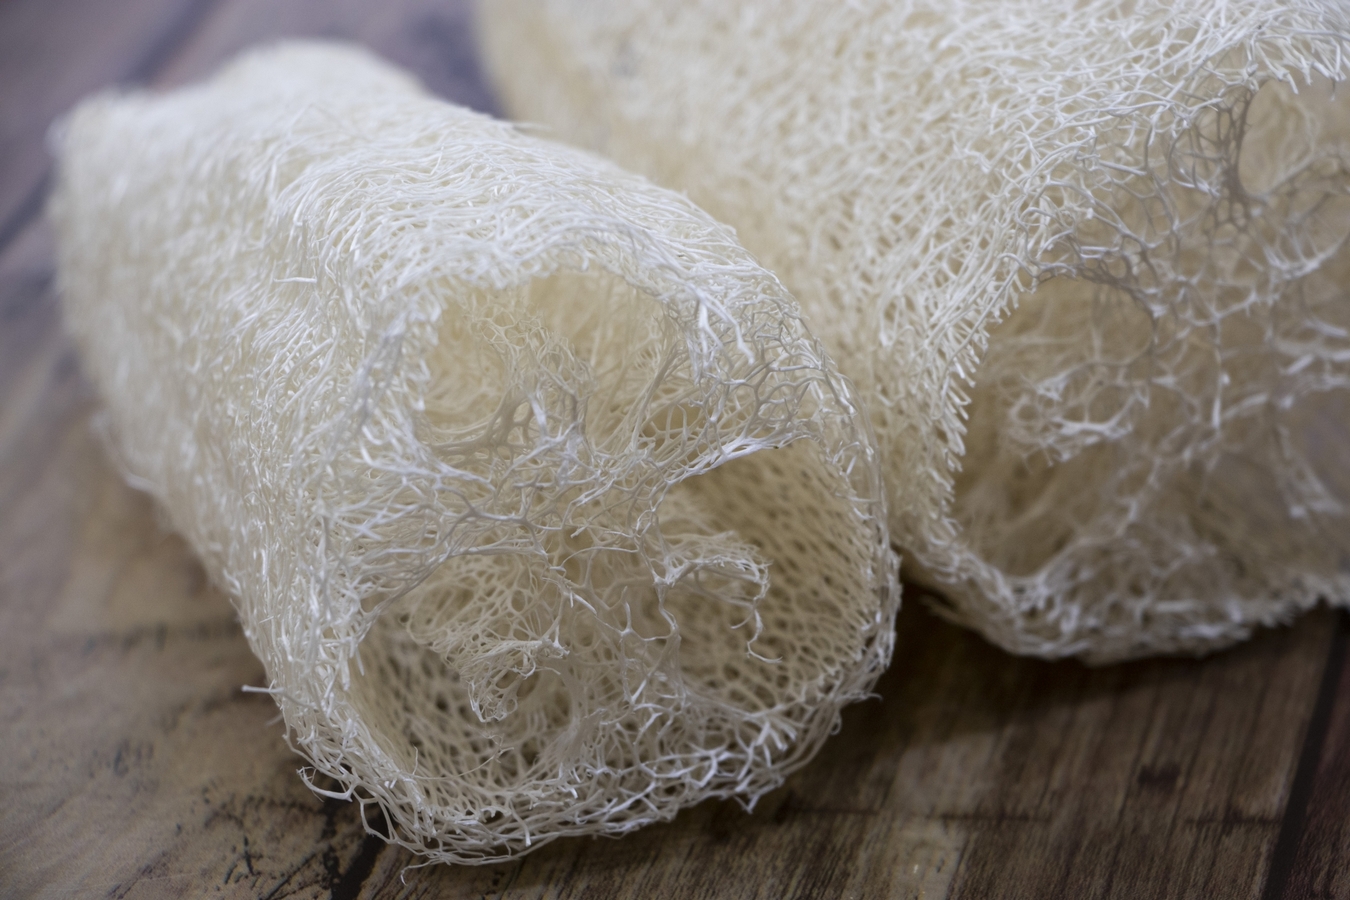
When it comes to processing Luffa sponges, there are various methods you can choose from depending on your preferences and the resources available to you. Two popular methods for processing Luffa sponges are drying and peeling.Drying is a commonly used method that involves removing the moisture from the Luffa gourds to transform them into sponges. To begin, harvest fully ripened Luffa gourds from the vine. These gourds should have turned brown and feel lightweight. Next, carefully cut the gourds into manageable sections. Scoop out the seeds and discard them or save them for future planting. With a sharp knife, remove the outer skin of the gourd, revealing the fibrous network inside. Rinse the fibers thoroughly to remove any remaining seeds or pulp. Once cleaned, allow the Luffa fibers to air dry in a well-ventilated area. This process may take a few weeks, but once completely dry, you will have your very own homemade Luffa sponges ready for use.
Peeling is another method that can be used to process Luffa sponges. This technique involves removing the outer skin of the Luffa gourd to expose the inner fibers. To begin, harvest ripe Luffa gourds and cut them into sections. Unlike the drying method, the seeds can be left intact during this process. With a knife or peeler, carefully peel away the outer skin, being mindful not to damage the fibers underneath. Once the skin is removed, rinse the Luffa thoroughly to remove any remaining debris. The peeled Luffa sponges can then be used immediately or further processed, such as by drying them for long-term storage.
Both drying and peeling techniques are beneficial and can produce high-quality Luffa sponges; select the technique that best suits your needs and available resources. The outcome will be a natural, environmentally friendly Luffa sponge that can be used for a variety of tasks, such as cleaning surfaces around the house or exfoliating skin in the shower.
9. How to achieve the desired texture and appearance of Luffa sponges
It takes close attention to detail during the growing, harvesting, and processing processes to get the ideal texture and appearance of Luffa sponges. Here are some crucial pointers to get you the greatest results.1. Select the right variety: There are different varieties of Luffa, such as angled Luffa and smooth Luffa. Choose the variety that best suits your desired texture and appearance. Angled Luffa tends to have a coarser texture, while smooth Luffa has a smoother surface.
2. Monitor the growing conditions: Luffa plants thrive in warm climates with plenty of sunlight. Provide adequate water, but avoid overwatering as it can lead to rotting. Regularly monitor the plants for pests or diseases and take appropriate measures to protect them.
3. Harvest at the right time: Luffa sponges are harvested when the fruit turns brown and starts to dry out on the vine. It is important to harvest them at the correct maturity stage to achieve the desired texture. If harvested too early, the sponges may be too soft and lack the characteristic fibrous texture.
4. Remove the outer skin: Once harvested, carefully remove the outer skin of the Luffa sponge. This can be done by soaking the sponge in water for a few hours or by peeling off the skin using your hands or a knife. Removing the skin reveals the fibrous network inside.
Watch How to Peel Green Luffa Video
Prior to storing your luffa sponges, make sure they are totally dry. Any moisture can cause mold or mildew, which can destroy the sponges. Let the sponges air out in a well-ventilated space for a few days until they are entirely dry.
To further protect your luffa sponges, consider storing them in a breathable container or bag. This will allow air circulation, preventing any potential moisture buildup. Avoid using plastic bags or airtight containers, as they can trap moisture and lead to the growth of mold or mildew.
Additionally, it's a good practice to periodically check on your stored luffa sponges. Inspect them for any signs of deterioration or pest infestation. If you notice any issues, remove the affected sponges and take necessary steps to prevent further damage.
By following these final steps for preserving and storing your luffa sponges, you can ensure that they remain in pristine condition for long-term use. With proper care, you'll be able to enjoy the benefits of your homegrown luffa sponges for an extended period, from incorporating them into your skincare routine to creating luxurious spa experiences.
10. Final steps for preserving and storing Luffa sponges for long-term use
After all the hard work of growing, harvesting, and processing your luffa sponges, it's crucial to ensure that they are properly preserved and stored for long-term use. Taking these final steps will not only maintain the quality of your luffa sponges but also extend their lifespan.After choosing the highest-quality luffa sponges, it is important to preserve them correctly. A pantry or cupboard is a good place to store them; high humidity or direct sunshine will eventually cause the sponges to deteriorate.
Watch Growing Luffa Gourds Video
We hope you found our ultimate guide to growing, harvesting, and processing luffa sponges helpful and informative. From the initial stages of planting and cultivating the vines to the exciting process of harvesting and transforming the luffas into luxurious spa sponges, we have provided you with a comprehensive overview.
🛒Luffa Gourd Seeds for Planting Heirloom, Non-GMO & Untreated 🛒
🛒Luffa Natural Sponge Products 🛒
In transparency and compliance with legal guidelines, please be aware that some of the links on this site are affiliate links. These are carefully chosen products that I have personally used, tested, and genuinely recommend. When you click and make a purchase through these links, I may earn a small commission, at no additional cost to you.
This commission helps support the maintenance of this site, allowing me to continue providing valuable content and recommendations. Rest assured, my priority is to offer authentic and reliable information, and I only affiliate with products that align with the values and standards I uphold.
Your trust means everything to me, and I appreciate your support. If you have any questions or concerns, please feel free to reach out. Thank you for being a valued part of our community!


